I started calisthenics because I thought the gym was boring. Then I got introduced to calisthenics and fell in love with it right away. I was a professional swimmer for a couple of years before I quit and found myself wondering what to do next. Now, 8 years later, I’m the heavyweight calisthenics world champion and a 5-time Swedish champion in calisthenics.
I decided that my weight and height would never be my limitation. I might not have the ideal body for calisthenics, but I made it my sport.
My goal is to inspire and motivate others to reach for their dreams and goals. Anything is possible if you truly want it.
Calisthenics Coach & Athlete
Besides working on my own goals and competing on the highest stage in the world, I help others through my online calisthenics coaching to reach the peak performance most people only dream of.
Considering adding a pair of dip bars to your home gym? Today's review of GORNATION dip bars will be immensely helpful. We'll cover everything from setup to cost, functionality, and my personal insights.
https://www.youtube.com/watch?v=goSYWNTGgRQ
The Youtube Review About GORNATION dip bars
Setting Up Your Dip Bars
Setting up the GORNATION dip bars is straightforward. The main components include the P-bars and the feet. Assembly involves a few screws and doesn't require many tools. Initial impressions? They're wider than many models on the market, which provides extra space for various exercises.
What’s in the Box?
2x Premium Dip Bars
2x Connecting Parts
8x End Caps for Both Feet
1x 25m Grip Tape 2.0
1x Tool and Screw Set
4x Hand Screws for the Connecting Parts
1x Assembly Instructions and Maintenance Instructions
Price and Value
The GORNATION dip bars are priced at €149. Although they may seem pricey, the durability and wide range of exercises you can perform with them justify the cost. These are not just a purchase; they're an investment in your fitness journey.
Performance and Versatility
Exercises You Can Do
Dips: The primary function of dip bars, these are perfect for both bent and straight leg dips.
Core Workouts: Leg raises and more are easily performed, thanks to the ample clearance.
Push-Ups: With their stable base, these bars allow for push-ups with a natural grip, reducing wrist strain.
Australian Pull-Ups: A fantastic way to work towards a front lever, these can be done safely and effectively.
Advanced Calisthenics: From front levers to planches, the GORNATION dip bars handle high-level calisthenics moves well.
Stability and Safety
The inclusion of connecting elements between the bars ensures they won't separate during use. This is crucial for safety during dynamic movements like handstands or high-intensity exercises. The GORNATION dip bars are designed with stability as a primary focus, featuring a robust connecting mechanism that locks the bars together securely. This added stability is essential when performing exercises that require precise balance and force distribution, such as handstands, front levers, and planches.
When executing a handstand or a planche, the body exerts a significant amount of lateral and vertical pressure on the equipment. Without proper stabilization, standard dip bars might wobble or even topple, creating a risk of injury. However, the connecting parts mitigate this risk by providing a firm, grounded base that does not shake or shift under pressure. This secure connection allows athletes to focus on their form and technique without the distraction or danger of unstable equipment.
Additionally, for exercises like the front lever, where the body is suspended horizontally, the stability of them becomes even more critical. The product maintains a steady hold, ensuring that the bars remain parallel and fixed, offering the necessary support to perform such advanced movements safely. The confidence in the equipment’s stability enhances performance as users can push their limits without fearing that the equipment might give way.
This superior level of stability not only makes the GORNATION dip bars safe but also expands the variety of exercises that can be performed effectively, making them a versatile and indispensable tool for anyone serious about mastering bodyweight exercises.
Detailed Specifications of the GORNATION Dip Bars
Here's what you need to know about the build and design of the GORNATION dip bars:
Material: Constructed from powder-coated black steel, ensuring durability.
Dimensions: The bars stand 90cm high, are 80cm long, and the feet extend to 50cm.
Bar Diameter: Each bar has a diameter of 40mm, providing a solid grip.
Weight: The total weight of the dip bars, including the connecting pieces, is 13.2kg.
Stability: Enhanced by the included connection parts, these can be quickly attached or detached, adding to the versatility of the setup.
Adjustability: The connection piece allows for multiple width adjustments, catering to personal preferences and varying the intensity and type of workout.
Construction Features: The dip bars come with sturdy, non-slip rubber feet to ensure both safety and support during use.
Assembly: Easy to assemble in under 5 minutes; all necessary tools and screws are included.
Additional Features: Each set includes 25 meters of Grip Tape 2.0, ensuring a firm and secure hold on the bars during workouts.
Personal Thoughts and Final Verdict
After six years of calisthenics, I've learned that investing in quality equipment pays off, and the GORNATION dip bars are no exception. They're built to last, easy to assemble, and versatile enough to cater to both beginners and advanced athletes. The thoughtful touches like extra grip tape and rubber feet for stability make these bars a standout choice.
One of the greatest advantages of owning the GORNATION dip bars is their capacity to facilitate a full range of bodyweight exercises right at home. This is ideal for those who prefer to avoid the costs associated with gym memberships or for anyone looking to supplement their gym workouts with home sessions. With these dip bars, you can effectively build bodyweight strength through exercises such as dips, push-ups, and advanced calisthenics movements, all from the comfort of your own space.
Additionally, for individuals focused on developing their physique and strength without relying on traditional gym equipment, these dip bars offer a practical solution. They provide a solid platform for enhancing bodyweight training, which is not only effective but also a time-efficient way to improve muscle tone, endurance, and overall fitness. The versatility of the GORNATION dip bars makes them one of the best workout equipment pieces for home gyms, ensuring that you can achieve comprehensive fitness goals without the need for a gym membership. This makes them an invaluable investment for your health and physical development over the long term.
Discount Code
If you're ready to purchase, don't forget to use the discount code "Simon" to save 10% on your dip bars. Every little bit helps!
Conclusion
Are the GORNATION dip bars worth the money? Absolutely. They offer a robust set of features that can support a wide array of exercises, making them a versatile addition to any home gym. If you're serious about your fitness goals, these dip bars are a wise choice.
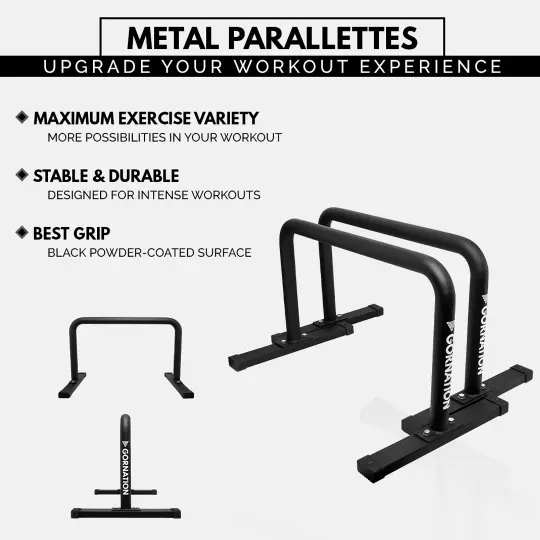
Calisthenics is a form of exercise that uses bodyweight to improve strength, flexibility, and endurance. The quality of your equipment plays a crucial role in maximizing your workout's effectiveness. Enter Gornation Metal Parallettes, a piece of equipment designed to boost your calisthenics game. In this article, I'll dive deep into these parallettes to see if they live up to the hype.
Overview of Gornation Metal Parallettes
Gornation Metal Parallettes are designed for serious athletes. Made from high-quality steel, these parallettes promise durability and a robust training experience. They feature a matte black powder-coated surface for optimal grip and come with 40mm diameter grips, which are ideal for various exercises. The tall design offers more training variety and range of motion, making them suitable for different calisthenics routines.
One of the standout features of Gornation Metal Parallettes is their durability. The steel construction ensures they can withstand intense workouts without compromising their structural integrity. The powder-coated finish helps prevent rust, adding to their longevity. Compared to wooden parallettes, which can wear down over time, these metal ones are built to last.
Grip and Comfort
The grip is crucial for exercises like handstands and push-ups. Gornation Metal Parallettes feature a 40mm diameter, which provides a natural grip that is neither too small nor too big. The matte surface improves the grip, reducing the need for excessive chalk. This is a significant improvement over wooden parallettes, which can become slippery without chalk.
Portability and Assembly
While the Gornation Metal Parallettes are heavier than their wooden counterparts, they are designed to be easily transportable. Each parallette comes with four bolts, making them easy to disassemble and pack into a suitcase or gym bag. This makes them practical for home use and gym settings. Assembling them is straightforward, with only eight screws needed.
Performance in Exercises
I tested these parallettes with a range of exercises, from basic push-ups to advanced handstands. The stability provided by the steel construction was clear, offering confidence during workouts. The height and length of the parallettes allow for a greater range of motion, which is beneficial for exercises like L-sits and planches. Overall, they performed exceptionally well across various exercises.
Price and Value for Money
At €99, Gornation Metal Parallettes offer great value for money. Considering their durability, ease of use, and the improved workout experience they provide, they are a worthy investment. Compared to other parallettes in the market, they stand out for their quality and performance.
Final Verdict
Gornation Metal Parallettes are a fantastic addition to any calisthenics enthusiast’s collection. They score high on durability, grip, and overall performance. While they may be slightly heavier, their benefits far outweigh this minor inconvenience. If you’re looking for reliable and effective parallettes, these are an excellent choice.
Conclusion
In summary, Gornation Metal Parallettes are designed to help you maximize your calisthenics workouts. Their robust build, comfortable grip, and versatility make them a standout option. Whether you're a beginner or an advanced athlete, these parallettes can help you achieve your fitness goals. Check out Gornation's website and use code Simon for a 10% discount.
They offer a wide range of training possibilities with their height and length, allowing for deeper push-ups, tricep dips, handstands, and more. The steel build ensures a robust training experience.
What exercises can I do on these Parallettes?
Exercises like push-ups, tricep dips, handstands, L-sits, planches, and more can be performed.
Metal Parallettes are heavier, longer, and taller, making them ideal for home gyms. Premium Parallettes are more portable and come with different grip materials.
Parallettes are one of the most popular pieces of Calisthenics equipment, as their versatility allows endless possibilities for your workouts. These mini straight bars will enable you to get a workout in anywhere, anytime - regardless of your current fitness level. With only parallettes and your body weight, you will be able to activate numerous muscle groups like your back, biceps, core, and more! Follow along with this workout guide, written by Simon Imhauser, to get a detailed breakdown on 50 Calisthenics exercises on Paralletes ranging from beginner to advanced level.
1. Normal Pushups | Beginner
Normal Pushups on parallettes are a great way to add variety and range of motion to a traditional Calisthenics exercise. This exercise will target your chest, shoulders, and biceps while also challenging your core stability.
Get into Push-Up Position. Grip the parallettes firmly and position yourself in a straight line with arms fully extended and shoulders over wrists.
Lower Your Body. Bend your elbows and lower body towards the parallettes, bringing your chest down between the bars.
Push Back Up. Engage your chest, shoulders, and triceps to push back up to the starting position, fully extending your arms while keeping your body straight and core engaged
2. Straight Bar Pushups | Beginner
This exercises offers a unique twist compared to the normal pushups on paralletes. Straight Bar Pushups require a different hand position, engaging the chest, shoulders, and triceps in a distinct way. The straight bar setup helps to stimulate the grip used in various Calisthenics exercises, making it a great addition to your workouts.
Set Up Your Parallettes: Place the parallettes horizontally shoulder-width apart on a stable surface.
Get into Push-Up Position. Grip the parallettes firmly and position yourself in a straight line with arms fully extended and shoulders over wrists.
Lower Your Body. Bend your elbows and lower body towards the parallettes, bringing your chest down between the bars.
Push Back Up. Engage your chest, shoulders, and triceps to push back up to the starting position, fully extending your arms while keeping your body straight and core engaged.
3. Deep Pushups | Intermediate
Deep Pushups on paralletes are an intermediate version of normal pushups. This variation increases the range of motion while targeting the chest, shoulders, and triceps more effectively.
Get into Push-Up Position. Grip the paralletes firmly and position yourself in a straight line with arms fully extended and shoulders over wrists.
Lower Your Body. Bend your elbows and lower body towards the parallettes, bringing your chest down between the bars.
Deep Range of Motion: Lower your body as far as comfortably possible, aiming to go deeper than a standard push-up. Your shoulders should reach the level of the bars.
Push Back Up. Engage your chest, shoulders, and triceps to push back up to the starting position, fully extending your arms while keeping your body straight and core engaged.
4. Wide Straight Bar Pushups | Intermediate
Wide straight bar push-ups on parallettes offer a dynamic twist from standard push-ups, leveraging a wider grip for enhanced chest, shoulder, and tricep activation. The wider bar setup challenges stability and engages muscles differently, perfect for advancing your Calisthenics routine.
Set Up Your Parallettes: Position the parallettes wider than shoulder-width apart and horizontally on a stable surface.
Get into Push-Up Position: Grip the parallettes firmly, placing your hands wider than shoulder-width apart and position yourself in a straight line with arms fully extended and shoulders over wrists.
Lower Your Body. Bend your elbows and lower body towards the parallettes, bringing your chest down between the bars. Lower your body as far as comfortably possible, aiming to go deeper than a standard push-up. Your shoulders should reach the level of the bars.
Push Back Up: Engage your chest, shoulders, and triceps to extend your arms and return to the starting position. Keep your body straight and core engaged throughout the movement for optimal muscle activation and stability
5. Archer Pushups | Intermediate
This exercises provides an excellent way to build unilateral strength, and offers a challenging variation from traditional push-ups. Unlike the previous pushup variations, Archer Pushups isolate each Sid of your upper body, enhancing the engagement of your chest, shoulders, and triceps. Archer push-ups on parallettes are perfect for advancing your calisthenics routine by targeting specific muscle groups and improving overall upper body strength.
Set Up Your Parallettes: Position the parallettes wider than shoulder-width apart on a stable surface.
Get into Push-Up Position. Grip the paralletes firmly and position yourself in a straight line with arms fully extended and shoulders over wrists.
Lower Your Body. Shift your weight to one side by bending the elbow of that arm while keeping the other arm straight. Lower your chest towards the bent arm, bringing it down as close to the parallettes as possible. The straight arm should remain extended, providing support and balance.
Push Back Up. Engage your chest, shoulders, and triceps of the bent arm to push back to the starting position, ensuring that your body remains straight and your core is tight. Repeat on the opposite side.
6. Explosive Pushups | Intermediate
Explosive Pushups are an exercise which combines strength and speed to build your upper body power. This exercise adds a powerful and dynamic element to you Calisthenics routine which targets the typical chest, shoulders, and triceps but also improves upper body explosiveness. Try these to challenge yourself in your next workout!
Get into Push-Up Position. Start in a traditional push-up position on the ground, with your hands placed slightly wider than shoulder-width apart.
Lower Your Body. Bend your elbows and lower your chest towards the ground, maintaining proper form and keeping your body straight.
Explode Up. Push off the ground with maximal force, aiming to lift your hands off the ground and land on the parallettes. Quickly grip the parallettes and stabilise your body in the elevated pushup position.
Perform a Push-Up. Bend your elbows and lower body towards the parallettes, bringing your chest down between the bars.
Return to Ground. Carefully lower yourself back to the ground push-up position by bending your elbows and controlling your descent.
7. Close Grip Pushups | Intermediate
Close Grip Pushups are a great exercise to target and build your tricep strength while also engaging your chest and shoulders. Close Grip Pushups target the chest and tricep muscles much more than your traditional pushup. Completing this exercise on the parallettes allows for a greater range of motion, which can lead to more effective muscle activation.
One Parallette. For this exercise, you will only need one parallette. Place it horizontally on a stable surface.
Get into Push-Up Position. Grip the bar firmly with your hands close together, aligning your shoulders directly above your wrists. Extend your body into a plank position.
Lower Your Body. Bend your elbows, keeping them close to your body, and lower your chest towards the parallettes. Aim to touch the bar with your chest.
Push Back Up. Engage your chest, shoulders, and triceps to push back up to the starting position, fully extending your arms while keeping your body straight and core engaged.
8. Underhand Grip Pushups | Intermediate
This exercise offers a distinctive way to engage the biceps and forearms. Underhand grip pushups provide a different hand position, which can improve grip strength and challenge your forearms compared to other pushup variations.
One Parallette. For this exercise, you will only need one parallette. Place it horizontally on a stable surface.
Get into Push-Up Position. Grip the bar with an underhand grip (palms facing away from you), positioning your Hans slightly narrower than shoulder width apart. Extend your body into a plank position.
Lower Your Body. Bend your elbows and lower your chest towards the parallette, keeping your elbows close to your body. Aim to bring your chest down as close to the parallette as possible.
Push BackUp. Engage your chest, shoulders, and triceps to push back up to the starting position, fully extending your arms while keeping your body straight and core engaged.
9. Iguana Pushups | Advanced
If you're looking for a push-up that challenges your stability and grip strength, the iguana push-up is an excellent choice. This advanced variation not only targets your chest, shoulders, and triceps but also engages your core and requires precise control throughout the movement. Performing iguana push-ups on parallettes adds an extra element of difficulty and allows for a greater range of motion.
One Parallette. For this exercise, you will only need one parallette. Place it vertically on a stable surface.
Get into Push-Up Position. Grip the bar with your hands stacked vertically on top of each other. Extend your body into plank position.
Lower Your Body. Bend your elbows and lower your chest towards the parallette, keeping your elbows close to your body. Aim to bring your chest down as close to the parallette as possible.
Push BackUp. Engage your chest, shoulders, and triceps to push back up to the starting position, fully extending your arms while keeping your body straight and core engaged.
10. One Arm Pushups | Advanced
One-arm push-ups on parallettes are an advanced exercise that tests upper body strength, core stability, and balance. This challenging exercises engages the chest, shoulders, and triceps while requiring control. Using parallettes can help lessen wrist strain by providing a neutral grip, making this exercise safer and more effective.
One Parallette. For this exercise, you will only need one parallette. Place it vertically on a stable surface.
Get into Push-Up Position. Place one hand on the parallette, gripping it firmly, and extend your body into a plank position. Position your feet wider than shoulder-width apart for better stability. Keep your free arm either behind your back or extended out to the side.
Lower Your Body. Bend your elbow and lower your chest towards the parallette, maintaining a straight line from head to heels. Keep your core engaged to prevent your body from twisting or sagging.
Push Back Up. Engage your chest, shoulder, and tricep muscles to extend your arm and push back up to the starting position.
11. Shrugs | Beginner
The Bodyweight Shrug on parallettes is a straightforward yet highly effective exercise that primarily targets the trapezius muscles, improving upper body strength.
Get into Shrug Position. Grip the parallettes firmly with your hands placed slightly wider than shoulder-width apart. Extend your arms fully, allowing your body to hang in a straight line.
Perform the Shrug. Elevate your shoulders towards you ears as high as possible, contracting your traps.
Lower Back Down. Slowly lower your shoulders back down to the starting position, maintaining control throughout the movement.
12. Assisted Dips | Beginner
Assisted dips on a single parallette bar offer an effective way to target and strengthen the triceps, chest, and shoulders while providing support for those working towards full bodyweight dips. Dips are known for their ability to engage all three heads of the triceps, making them excellent for enhancing strength in the upper body.
One Parallette. For this exercise, you will only need one parallette. Place it horizontally on a stable surface.
Get into Dip Position. Grip the parallette firmly with both hands behind your body, placing them slightly wider than shoulder-width apart. Extend your legs out in front of you or bend them at the knees for added stability. Keep your body straight and core engaged.
Perform the Dip. Lower your body by bending your elbow, allowing your upper body to descend towards the parallette behind you. Aim to lower yourself until your elbows are bent at a 90-degree angle or slightly less.
Push Back Up. Engage your triceps, chest and shoulders to push yourself back up to the starting position, extending your arms fully.
13. Wide Deep Pushups | Intermediate
Wide deep push-ups on parallettes offer a challenging variation that significantly increases your range of motion, enhancing shoulder mobility, strength, chest flexibility, and core stability. Unlike standard wide push-ups, this version allows you to lower your chest deeper between the parallettes, intensifying the muscle engagement and difficulty of the exercise.
Set Up Your Parallettes. Position the parallettes wider than shoulder-width apart on a stable surface.
Get into Push-Up Position. Grip the parallettes firmly, placing your hands wider than shoulder-width apart and position yourself in a straight line with arms fully extended and shoulders over wrists.
Lower Your Body. Bend your elbows and lower your chest towards the parallettes, aiming to descend deeper than a standard push-up. This increased depth challenges your shoulder mobility and strength, as well as your chest flexibility.
Push Back Up. Engage your chest, shoulders, and triceps to push back up to the starting position, fully extending your arms while keeping your body straight and core engaged.
14. Skull Crusher Pushups | Intermediate
Skull crushers target the triceps through a challenging movement that involves lowering your forehead towards the parallette and pushing back up, emphasizing tricep activation throughout. This exercise variation requires precision and control, making it effective for building tricep strength and muscle definition.
One Parallette. For this exercise, you will only need one parallette. Place it horizontally on a stable surface.
Get into Position. The parallette should be slightly above you. Grip the bar firmly with both hands, positioning your palm slightly forward of your shoulder and ensuring your wrist is aligned comfortably.
Lower Your Forehead. Bend your elbows to lower your forehead towards the parallette, keeping your arm close to your body and your elbow pointing backward.
Push Back Up. Engage your triceps, chest, and shoulders to extend your arm and push your body back up to the starting position.
15. Decline Pushups | Intermediate
Decline pushups proceed a challenging variation that targets the chest, shoulders, and triceps. The angle between your arms and torso increases during decline push-ups, making your center of mass higher. This increasing the force on your hands, making the exercises more challenging and effective for upper body strength development.
One Parallette. For this exercise, you will only need one parallette. Place it horizontally behind you on a stable surface.
Get into Decline Push-Up Position. Place your hands firmly on the ground slightly wider than shoulder-width apart. Elevate your feet onto the parallette, creating a decline angle with your body.
Lower Your Body. Bend your elbows and lower your chest towards the ground, keeping your elbows close to your body and maintaining control throughout the movement.
Push Back Up. Engage your chest, shoulders, and triceps to push yourself back up to the starting position, extending your arms fully.
16. Pseudo Pushups | Intermediate
Pseudo push-ups emphasize shoulder and bicep strength, differing from regular push-ups which focus on chest and triceps development. This exercise requires a maintained forward lean, heavy utilization of scapular protraction, and slight outward rotation of the hands for optimal performance.
Get into Pseudo Push-Up Position. Place your hands firmly on the parallette, slightly wider than shoulder width apart, in a neutral grip. Most of your weight will be loaded on your hands and your toes will be pointed into the ground.
Perform the Pseudo Push-Up. Lower your body by bending your elbows, allowing your chest to descend towards the parallette. Maintain a forward lean with your body in a straight line.
Push Back Up. Engage your shoulders and biceps to push yourself back up to the starting position, fully extending you arms. Keep your core engaged and maintain control.
17. Pike Pushups | Intermediate
Pike pushups are excellent for targeting shoulder strength, wrist stability, and core engagement, making them a foundational exercise for developing the strength required for handstands and handstand push-ups. This progressive movement emphasizes the shoulders and arms while also strengthening the core.
Get into the Pike Pushup Position. Start in a plank position with your hands gripping the parallettes and your arms straight. Walk your feet towards the parallettes, lifting your hips towards the ceiling to form an inverted V-shape with your body. Your hands should be directly under your shoulders and your head positioned between the parallettes.
Perform the Pike Pushup. Bend your elbows and lower your head towards the space between the parallettes, maintaining the inverted V-shape of your body. Lower yourself until your head is close to the ground, keeping your core right and your elbows pointing slightly outwards.
Push Back Up. Press through your shoulders and arms to extend your elbows and return to the starting position, lifting your hips back towards the ceiling. Maintain control throughout the movement
18. Planche Lean | Intermediate
Planche lean on parallettes is a highly effective exercise for developing the strength and stability required for achieving the planche position. This isometric exercise closely mimics the joint angles and muscle activation of the planche, making it an essential component of planche training.
Get into Planche Lean Position. Start by gripping the parallettes firmly with you hands slightly shoulder-width apart. Lean your horse forward while keeping your body straight and your toes pointed. Your shoulders should be positioned slightly in front of your hands, mimicking the forward lean of the blanche position.
Perform the Planche Lean. Maintain a tight core and houlder protraction (shoulder blades spread apart). Hold this position for 3 seconds, aiming to gradually increase your hold duration as you build strength and endurance. Make sure your elbows are locked out and your wrists are strong and stable!
19. L-Sit | Intermediate
The L-Sit is a great full-body exercise that engages your quads triceps hip flexors, and shoulders. This seemingly simple movement requires great strength, as it utilizes both your upper and lower body. The L-Sit also works on your isometric strength and stability.
Get into L-Sit Position. Sit on the ground between the parallettes with your hands placed firmly on the bars, slightly wider than shoulder-width apart. Press down through your palms to lift your body off the ground, extending your legs straight out in front of you. Keep your back straight, chest lifted, and legs together, forming an "L" shape with your body.
Maintain Proper Form. Engage your core muscles to keep your legs elevated and your body stable. Focus on keeping your shoulders down and away from your ears, with your arms straight and elbows locked. Start with holding the L-Sit position for 3 seconds and gradually increase the duration as you gain strength.
20. Elbow Lever | Intermediate
The elbow level challenges you to hold your body horizontally, supported by your hands with bent arms. Mastering this skill, has numerous benefits including enhanced body awareness, hand-balancing mechanics, and wrist strength and mobility. The L-Sit also trains core strength, allowing you to work on the strength necessary to master other Calisthenics skills.
Get into Starting Position. Stand between the parallettes and place your hands firmly on the bars. Bend your arms and tuck your elbows into your sides, creating a strong base with your forearms supporting your torso.
Perform the Elbow Lever. Lean forward, lifting your feet off the ground and extending your legs behind you. Your body should be horizontal, with your weight supported by your hands and bent arms. Keep your core tight and your legs straight, forming a straight line. Maintain the horizontal position, start with holding the L-Sit position for 3 seconds and gradually increase the duration as you gain strength.
21. 90 Degree Hold | Advanced
The 90 Degree Hold, also known as the Bent Planche, takes a great amount of arm strength, Aside from the arm strength required, the 90 degree hold also involves the back, leg, and wrist muscles while also working on your balance and overall coordination.
Get into Starting Position. Start in a push-up position with your hands gripping the parallettes and your arms straight. Lean forward, bending your elbows to lower your body, keeping your elbows close to your torso.
Transition to 90 Degree Hold. Continue leaning forward until your elbows form a 90-degree angle. Your body should be parallel to the ground, with your legs extended straight behind you. Engage your core, back, and leg muscles to maintain stability and balance. Start with holding the 90 Degree Hold for 3 seconds and gradually increase the duration as you gain strength.
22. Frog Stand | Beginner
The Frog Stand is a Calisthenics fundamental that saves as the basis for many advanced skills, like the place or handstand. This exercise helps improve body tension and develops a sense of balance and coordination essential for more advanced calisthenics movements. The Frog Stand will enhance your upper body strength and core stability.
Get into Starting Position. Stand carefully on the parallettes and place your hands firmly on the bars. Bend your knees and squat down, positioning your knees close to your elbows.
Transition to Frog Stand. Lean forward, shifting your weight onto your hands. Lift your feet off the parallettes and rest your knees on your elbows, creating a tripod with your hands and knees. Keep your elbows slightly bent to maintain control and balance. Start with holding the Frog Stand for 3 seconds and gradually increase the duration as you gain strength.
23. Flutter Kicks | Intermediate
L-sit flutter kicks on parallettes are a dynamic variation of the traditional L-sit, adding an extra challenge to your core workout. This exercise not only targets your abdominal muscles but also engages your quadriceps, hip flexors, triceps, and shoulders, making it an effective full-body movement.
Get into L-Sit Position. Sit on the ground between the parallettes with your hands placed firmly on the bars, slightly wider than shoulder-width apart. Press down through your palms to lift your body off the ground, extending your legs straight out in front of you. Keep your back straight, chest lifted, and legs together, forming an "L" shape with your body.
Perform the Flutter Kicks. While maintaining the L-sit position, begin to alternately lift and lower each leg in a fluttering motion. Move your legs up and down in a controlled manner, keeping your core tight and your legs straight. Aim for small, quick movements to maximize the intensity.
24. Handstand | Intermediate
The handstand is a foundational skills in Calisthenics, offering progressions to advanced exercises such as the handstand pushup. Many people find it easier to practice handstands on parallettes initially because the extended lever provides enhanced forward and backward balance compensation. This exercises not only improves overall body control and balance but also strengthens the shoulders, arms, and core.
Get into Starting Position. Stand between the parallettes and place your hands firmly on the bars. Your palms should be facing inward, with your fingers gripping the parallettes for stability.
Kick Up into Handstand. Bend one leg and kick up with the other leg to bring your body into an inverted position. Your legs should come together, forming a straight line from your hands to your feet. Engage your core and glutes to maintain a tight and stable position. Focus on keeping your body straight and able. Aim to hold for as long as possible, gradually increasing the duration as you build the strength and balance.
25. Handstand Pushups | Advanced
Handstand pushups are one of the most effective upper body strength builders as they target the deltoids, shoulders, and triceps. In addition to targeting these muscles, they also engage your pecs, traps, lats and core muscles that are used to stabilize your body while inverted. Performing this exercise on parallettes can make this exercise more accessible, as the bars make it easier to balance. This is a great exercise for your Calisthenics training.
Get into Handstand Position. Stand between the parallettes and place your hands firmly on the bars. Kick up into a handstand position, bringing your legs together to form a straight line from your hands to your feet.
Lower Your Body. While maintaining the handstand position, bend your elbows to lower your body down towards the parallettes. Your head should move between the parallettes as you descend, keeping your body straight and your core engaged.
Perform the Pushup. Once your head is just above the ground or between the parallettes, push through your hands to extend your arms and return to the starting handstand position. Focus on keeping your body straight and stable throughout the movement.
26. Deep Handstand Pushups | Advanced
This exercise is a great variation to the handstand pushups, as it targets most of the same upper body muscles. However, deep handstand push-ups require a greater range of motion, demanding even more strength and control. Incorporating deep handstand push-ups into your routine will significantly improve your ability to perform other advanced calisthenics skills.
Get into Handstand Position. Stand between the parallettes and place your hands firmly on the bars. Kick up into a handstand position, bringing your legs together to form a straight line from your hands to your feet.
Lower Your Body. While maintaining the handstand position, bend your elbows to lower your body down towards the ground. Unlike standard handstand push-ups, aim to lower your body until your shoulders dip below the level of the parallettes. This deeper range of motion intensifies the exercise.
Perform the Pushup. Once your shoulders are below the level of the parallettes, push through your hands to extend your arms and return to the starting handstand position. Focus on keeping your body straight and core engaged throughout the movement.
27. 90 Degree Pushups | Advanced
90 degree pushups are great upper body exercise, and one of the best bodyweight exercises. Once you are comfortable with the handstand pushup, this exercise can be done. The 90 degree pushup is a difficult Calisthenic exercise as it requires both strength in the horizontal and vertical plane, and the ability to transition in and out of these planes.
Get into Handstand Position. Stand between the parallettes and place your hands firmly on the bars. Kick up into a handstand position, bringing your legs together to form a straight line from your hands to your feet.
Lower Your Body. While maintaining the handstand position, slowly bend your elbows and begin to lower your body. Aim to bring your chest towards the parallettes, keeping your body straight and core engaged. Continue to lower yourself until your body is completely horizontal, with your shoulders in line with your hands.
Push Back Up. From the horizontal position, push your body back up to elbows bent to 90 degrees and then to full extension. Extend your arms fully and return to the starting handstand position.
28. Impossible Pushups | Beginner
Despite their name, the Impossible pushups on parallettes can be done by beginners. This exercise intensely targets the triceps, chest, and shoulders. Incorporating impossible pushups into your routine is perfect for those looking to elevate their Calisthenics training and build extraordinary upper body strength and stability.
Get into Plank Position: Begin in a plank position with your hands gripping parallettes. Your body should form a straight line from your head to your heels.
Lower Your Body: Slowly lower your body - your elbows should bend as you descend, bringing your chest closer to the parallettes. The goal is to reach the deepest point, where your chest is near the parallettes and your arms are bent to the maximum extent.
Push Back Up: Push back up from the deepest point, extending your arms and returning to the starting position.
29. Assisted Victorian Hold | Intermediate
If you are looking to build core and upper body strength the assisted victorian hold is a great exercise for you. This hold really challenges the core, shoulders, and lower back muscles requiring significant stability and control. The assisted victorian hold can help you develop the strength and technique to progress to a full Victorian hold.
Get into Starting Position: Sit on the floor with your legs extended in front of you, positioned between the parallettes. Place your hands on the parallettes beside your hips. Engage your core and lift your hips slightly off the ground.
Hold the Assisted Victorian: Lean back, keeping your body straight. Extend arms behind you, pressing hands into the parallettes. Lift your legs off the floor, maintaining a horizontal position with feet touching the ground. Hold this position for 3 seconds and progress as you build strength.
30. Resistance Band Pushups | Intermediate
Resistance band pushups are a great way to add difficulty to your workout routine. Incorporating a resistance band will increase the workload on your chest, shoulder, and triceps, making each rep more challenging and effective.
Get into Pushup Position: Place a resistance band across your upper back, holding the ends securely under your hands. Get into a standard pushup position with your hands shoulder-width apart on the parallettes.
Perform the Pushup: Lower your body towards the ground, keeping your core engaged and your elbows at a 45-degree angle. Aim to get your chest to the level of the parallettes.
Push Back Up. Push back up to the starting position against the resistance of the band.
31. Tuck Planche | Intermediate
This Calisthenics movement will help you build incredible core and upper body strength. The tuck planche will challenge your shoulders, chest, arms, and core. It will also help you develop balance, control and overall body strength.
Get into Tuck Planche Position: Place your hands shoulder-width apart on parallettes or the ground. Lean forward slightly, lift your feet off the ground, and bring your knees to your chest. Your arms should be straight, and your back should be rounded.
Hold the Tuck Planche: Focus on maintaining balance and keeping your body stable. Engage your core, shoulders, and arms to hold this position. Start with 3 second holds and increase duration of hold as you build strength.
32. Advanced Tuck Planche | Advanced
The advanced tuck planche is a progression from the tuck planche, providing an even greater challenge for your core and upper body strength. In this variation, your knees are slightly extended, making the exercise more demanding. This progression is a crucial step toward achieving the full planche, as it bridges the gap between the foundational tuck planche and the highly advanced full planche.
Get into Tuck Planche Position: Place your hands shoulder-width apart on parallettes or the ground. Lean forward slightly, lift your feet off the ground, and bring your knees toward your chest, but not fully tucked. Your legs should be bent at a wider angle than in the tuck planche. Keep your arms straight and your back rounded.
Hold the Advanced Tuck Planche: Maintain your balance and keep your body stable. Engage your core, shoulders, and arms to hold this position. Start with 3 second holds and increase duration of hold as you build strength.
33. Frog Planche | Intermediate
The frog planche is a foundational move in calisthenics that helps build strength, balance, and control. This exercise primarily targets your shoulders, arms, and core. It's a great starting point for progressing to more advanced planche variations.
Get into Starting Position: Place your hands shoulder-width apart on parallettes or the ground. Squat down and place your knees on the outside of your elbows. Lean forward, lifting your feet off the ground while keeping your knees bent and tucked close to your body.
Hold the Frog Planche: Balance on your hands with your knees resting on your elbows. Engage your core, shoulders, and arms to maintain this position. Start with 3 second holds and increase duration of hold as you build strength.
34. Full Planche | Advanced
The full planche is a Calisthenics staple that requires exceptional strength, balance, and control. This is one of the most demanding body weight exercises, as it requires both lower and upper body strength to keep yourself up in a horizontal position. Mastering the full planche showcases impressive upper body strength and stability.
Get into Full Planche Position: Place your hands shoulder-width apart on parallettes. Lean forward slightly and lift your feet off the ground, extending your legs straight behind you. Your body should form a horizontal line from head to toes.
Hold the Full Planche: Maintain your balance and keep your body straight and parallel to the ground. Engage your shoulders, chest, arms, and core to hold this position. Start with 3 second holds and increase duration of hold as you build strength.
35. Straight Bar Handstand | Advanced
The straight bar handstand is an advanced variation of the normal handstand on parallettes. This exercise requires the parallettes to be placed horizontally for a straight hand grip, targeting your shoulders, arms, and core, helping you develop stability and muscular endurance.
Get into Handstand Position: Place your hands shoulder-width apart on horizontally positioned parallettes. Kick up into a handstand position, ensuring your body forms a straight line. Keep your arms straight and maintain balance.
Hold the Handstand: Focus on keeping your body stable and aligned. Engage your shoulders, arms, and core to hold the position. Start with 3 second holds and increase duration of hold as you build strength.
36. One Arm Handstand | Advanced
The one arm handstand is a difficult Calisthenics exercise that requires upper body strength, core stability, and balance. This movement requires strength in the shoulders, arms, and chest as balancing your entire body on one arm puts immense pressure on these muscles.
Get into Handstand Position: Place your hands on the parallettes. Kick up into a regular handstand position, ensuring your body forms a straight line.
Transition to One Arm Handstand: Gradually shift your weight to one arm and slowly lift the other hand off the parallettes, holding it close to your body or extended to the side for balance. Focus on maintaining stability and control.
37. Maltese | Advanced
The Maltese is one of the most difficult Calisthenics static movements. It is a progression from the planche, as it requires wider hand placement and a more extreme forward lean.
Get into Maltese Position: Place your hands on the parallettes a little wider than shoulder width apart and lean forward, extending your legs straight behind you. Your body should be parallel to the ground, forming a straight line.
Hold the Maltese: Focus on maintaining your body position, keeping it parallel to the ground. Balance and stability are key, so make small adjustments as needed. Start with 3 second holds and increase duration of hold as you build strength.
38. One Arm Flag | Advanced
This exercise is not only visually stunning, but highly advanced that requires much strength, balance, and control. The one arm flag requires you to start in a handstand position, while slowly shifty your lower body sideways. Your shoulders, arms, and core will be intensely engaged during this exercise!
Get into Handstand Position: Begin in a handstand position on parallettes, ensuring your body forms a straight line from your hands to your feet. Keep your arms and legs straight while maintaining balance.
Transition to One Arm Flag: Gradually shift your weight to one arm, keeping your core tight and your body aligned. Slowly lower your body sideways, extending your legs horizontally while maintaining a straight line. Use your free arm for balance, either extended out or kept close to your body. Focus on maintaining stability and control.
39. Tuck Planche Pushups | Advanced
Tuck planche pushups are an advanced calisthenics exercise that combines the strength and balance of a tuck planche with the dynamic movement of a pushup. This exercise targets your shoulders, chest, triceps, and core.
Get into Tuck Planche Position: Begin by placing your hands on the parallettes. Get into the tuck planche position, with your knees tucked to your chest and your body balanced on your hands. Your arms should be straight, and your back rounded.
Lower Your Body: Lower your body by bending your elbows, keeping your knees tucked and your body close to the parallettes. Aim to get your head to the level of the parallettes.
Push Back Up. Once you reach the bottom position, push back up to the starting tuck planche position by extending your arms. Maintain control and balance throughout the movement.
40. Full Planche On Straight Bar | Advanced
The full planche on a straight bar is one of the most advanced Calisthenics movements. On a straight bar, the full planche requires supinated grip which places significant tension on your biceps and elbows, adding a layer of difficulty and enhancing muscle engagement.
Get into Starting Position: Place your hands on the parallettes positioned next to each other horizontally in a supinated grip. Lean forward slightly and lift your feet off the ground, extending your legs straight behind you. Your body should form a horizontal line, parallel to the ground.
Perform the Full Planche: While maintaining the horizontal body position, pull your body slightly upward by engaging your back and arm muscles. The movement is subtle, focusing on maintaining the straight body line and engaging the correct muscles. Start with 3 second holds and increase duration of hold as you build strength.
41. Straddle Planche Pushups | Advanced
Straddle planche pushups are an easier variation of the planche pushup that incorporates a wider leg position. The wider leg position targets your shoulders, chest, triceps, and core, while also engaging your hip flexors and inner thighs.
Get into Straddle Planche Position: Place your hands shoulder-width apart on parallettes. Lean forward slightly and lift your feet off the ground, extending your legs straight behind you. Open your legs wide - they should be outside of the parallettes.
Lower Your Body: Lower your body by bending your elbows, keeping your legs spread wide and your body straight. Your chest should come close to the parallettes as shown in the video.
Push Back Up. Once you reach the bottom position, push back up to the starting straddle planche position by extending your arms.
42. Full Planche Pushups | Advanced
Planche pushups incorporate the strength and balance of a static planche while combining the dynamic movement of a pushup. Planche pushups require an advanced level of strength and immense body control.
Get into Full Planche Position: Place your hands shoulder-width apart on parallettes. Lean forward slightly and lift your feet off the ground, extending your legs straight behind you. Your body should form a horizontal line from head to toes.
Lower Your Body: Lower your body by bending your elbows, keeping your legs together and your body straight. Your chest should come close to the parallettes as shown in the video.
Push Back Up. Once you reach the bottom position, push back up to the starting straddle planche position by extending your arms.
43. L-Sit To Full Planche | Advanced
L-Sit to Full Planche is a dynamic calisthenics move that transitions from an L-sit to a full planche. This move challenges your strength, balance, and coordination, targeting the core, shoulders, triceps, and chest.
Get into L-Sit Position: Begin in an L-sit position with your hands on the parallettes, legs extended straight forward, and body forming an "L" shape. Engage your core and keep your arms straight.
Transition to Planche: Shift your weight forward while lifting your legs. Lean your torso forward as your legs move backward, maintaining a straight body line. Keep your core tight and your arms straight.
Hold the Full Planche: Once your body is parallel to the ground, hold the position. Maintain a straight line from head to toes, keeping your arms locked. Start with 3 second holds and increase duration of hold as you build strength.
44. Tuck Planche To Handstand | Advanced
The Tuck Planche to Handstand is a demanding and highly rewarding exercise that transitions from a tuck planche position to a handstand. Transitioning from the tuck planche to a fully extended handstand requires and develops exceptional strength, balance, and coordination. This exercise primarily targets the shoulders, triceps, and core.
Get into Tuck Planche Position: Begin by placing your hands on the parallettes. Get into the tuck planche position, with your knees tucked to your chest and your body balanced on your hands. Your arms should be straight, and your back rounded.
Transition to Handstand: Slowly extend your legs and straighten your body while pushing through your hands. Raise your hips and align your body vertically. Start with 3 second holds and increase duration of hold as you build strength.
45. Tuck Planche To L-Sit | Advanced
The Tuck Planche to L-Sit is a dynamic and challenging exercise that transitions from a tuck planche to an L-sit. This exercise primarily targets the shoulders, triceps, and core, with additional engagement from the chest and hip flexors to maintain stability and control throughout the movement.
Get into Tuck Planche Position: Begin by placing your hands on the parallettes. Get into the tuck planche position, with your knees tucked to your chest and your body balanced on your hands. Your arms should be straight, and your back rounded.
Transition to L-Sit: Slowly extend your legs forward while lowering your hips. Keep your arms straight and control the movement with your core. Move smoothly from the tuck position to having your legs fully extended in front of you. Start with 3 second holds and increase duration of hold as you build strength.
46. L-Sit To Handstand | Advanced
The L-Sit to Handstand is an advanced calisthenics exercise that combines strength, balance, and control. Starting from an L-sit position, where your legs are extended forward and hands are pressed into the floor, this move transitions smoothly into a handstand.
Get into L-Sit Position: Begin in an L-sit position with your hands on the parallettes, legs extended straight forward, and body forming an "L" shape. Engage your core and keep your arms straight.
Transition to Handstand: Slowly lift your legs and hips while pushing through your hands. As your legs rise, tuck them close to your body and then extend them upwards, aligning your body vertically. Start with 3 second holds and increase duration of hold as you build strength.
47. L-Sit To Tuck Planche | Advanced
L-sit to tuck Planche is another great dynamic Calisthenics exercise where you transition from an L-sit to a Tuck Planche. This move engages multiple muscle groups from your upper and lower body, improving overall strength. This exercise requires flexibility and mobility in the hips, hamstrings, and shoulders.
Get into L-Sit Position: Begin in an L-sit position with your hands on the parallettes, legs extended straight forward, and body forming an "L" shape. Engage your core and keep your arms straight.
Transition to Tuck Planche: Slowly lift your legs while leaning your torso forward. As your hips rise, bend your knees and tuck them into your chest. Keep your arms straight and engage your core to lift your body off the ground.
48. Wide Handstand | Advanced
A Wide Handstand is a static handstand variation where the hands are placed wider than shoulder-width apart. Unlike a regular handstand, the wide handstand places more emphasis on the shoulders, chest, and outer triceps due to the increased distance between the hands.
Starting Position: Begin in a standing position with your arms extended overhead. Place your hands on the parallettes wider than shoulder-width apart.
Kick Up: Engage your core and kick one leg up, followed by the other, to bring your body into an inverted position. Once in the wide handstand position, keep your arms straight and engage your shoulders, chest, and core. Start with 3 second holds and increase duration of hold as you build strength.
49. Victorian Hold | Advanced
The Victorian Hold on parallettes is an advanced static exercise where the body is held parallel to the ground. Unlike other static holds, the Victorian Hold places immense strain on the entire upper body and core due to its parallel position, making it one of the most challenging calisthenics holds.
Get into Starting Position. Maintain a firm grip on the parallettes slightly behind your hips. Lean back with a straight torso, ensuring shoulders are retracted and chest is pushed forward. Extend legs straight out in front parallel to the ground.
Perform the Victorian Hold: Slowly lower your body until it is parallel to the ground. Keep your arms straight and engage your shoulders, chest, back, and core to maintain this position. Your body should form a straight line.
50. V-Sit | Intermediate
The V-Sit is a static Calisthenics move where the body forms a "V" shape, with the legs extended upward and the hands supporting the body on the ground. This position requires and develops significant core, hip flexor, and shoulder strength, as well as balance and flexibility.
Get into Starting Position: Begin seated on the floor with your legs extended in front of you and hands placed on the parallettes. Engage your core and press your hands firmly into the ground.
Lift into V-Sit: Lift your legs and torso simultaneously to form a "V" shape with your body. Keep your arms straight and support your weight with your hands. Maintain tight core engagement and straight legs, pointing your toes upward. Start with 3 second holds and increase duration of hold as you build strength.